|
||
|
|
|

![]()
| Pre-requisites Setup First contact Search a route More... Contacts Known issues Todo i-Métro |
After a
long wait, Métro |
| Pre-requisites |
The current version of the program will run only on BlackBerry devices with OS version 3.6.0 or later. A color screen is highly recommended (you would miss a lot of information on a b&w screen). If your BlackBerry has a removable memory card, you will be able to copy the city databases directly on the card. If not, a functioning network connection is required to search and download the city databases needed to run the program. In both cases, please read the instructions below to load the city files. Before using Métro |
| Top |
| Setup | |
| Métro To install Métro For a desktop installation, you can download the MetroBB.zip
package and follow the instructions provided in the included
" Métro |
 |
| Top | |
| First contact | |
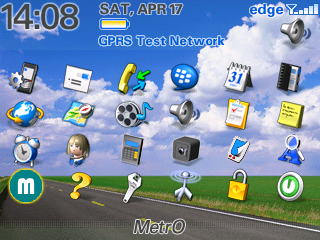
| When first starting the
program, the city list is displayed and
it will probably be empty: a message will tell you so.
All features in the program are accessed through menus. Access the menu now on your device and you will have one important function available: "Complete List". Select this option to access the list of available cities on our servers (again, a network connection is necessary for this to work). When the list is empty, a button also lets you quickly load the server list. Note: if you have a removable
memory card in your BlackBerry, you may also
directly copy the city databases in the "metro" (all lowercase)
directory under the root of the card (copy the individual
".pdb" files corresponding to the cities you are interested in,
not the full ".zip" file). You can use all the files from the
Métro |
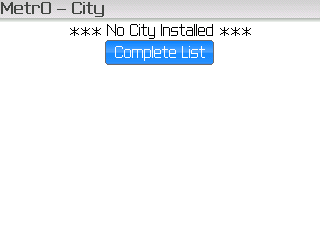 |
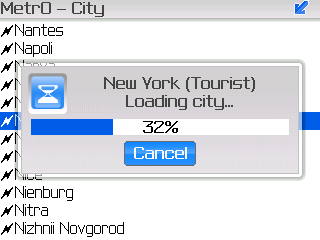
| Whenever the program may
take a long time to process a command, a pop-up window will
tell you to be patient. This is not blocking
any other task on your Blackberry, especially if you receive
a call.
The program always gets its data from our servers. This ensures that you always have access to all the cities available, wherever you are, and that the data is up to date. In case you wonder, we do not use or store any personal data coming from your BlackBerry. |
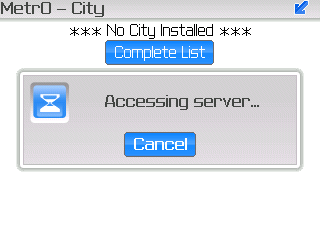 |
If you receive an error
when trying to connect, it may be worth checking the "Setup"
option. It will also be helpful if you want to tweak the
connection mode (e.g. forcing the use of a WiFi network).
These options have been reported to work in most cases. However, there still may be configurations that are not handled well. Please send us a detailed report if you cannot connect even after trying out all these options. This configuration screen also lets you, if your BlackBerry supports the feature, specify that the city databases are to be installed on a memory card. If you check this option, all the files you download (new and updated) will be copied on the card, if one is accessible.. |
 |
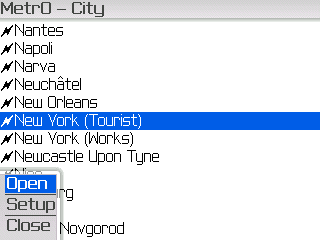
| After getting the information
from our servers, a list of all cities
available for Métro At the moment, the program supports only files encoded in a standard ASCII charset. Support for other charsets may be added in the future.. Select the city you want to use (you may enter the first characters of its name to scroll faster) and access the menu: you can see a new option to "Open" the city. |
 |
| Now, loading the city can
take a while, especially if you have low bandwidth on your
network connection. Yes, once again, a network connection is
necessary to get a city file.
However, from this point, no connection will be needed anymore (unless you want to download other cities). The files are stored locally on your device and you can access any city you have previously loaded without accessing a server. |
 |
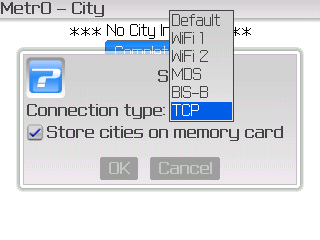
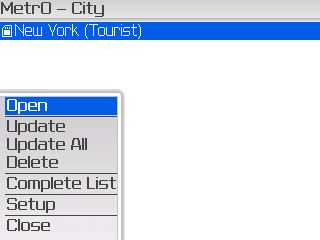
| You can return at any time to the city
list, with the "City" option of the main screen menu. It will
display the cities you have installed. A specific icon shows
the files present on a memory card (as in the screenshot).
As above, you may load the complete list of cities available and open a file. The menu also offers new options for the installed databases:
|
 |
| If everything went well with the city
loading, you should be taken back to the program main
screen, and the window title shows the name of the
city you have opened.
It's now time to actually use the program and search your first route in the public transportation system of the city you just loaded... |
 |
| Top | |
| Search a route | |
| To search a route, you have
to provide your start and end stops. You may simply
enter the stop names in the fields at the top
of the screen (marked with green and red flags). You don't have
to bother with special characters and accents (and even
spaces): the program will recognize stop names all the
same.
You can use the "enter" key to switch from the departure to the arrival field and next to run the search (or use the "Go!" option in the menu). If you are not sure of the stop names, the "Stops" option in the menu will help you select them in a complete list. |
 |
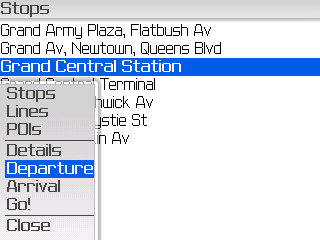
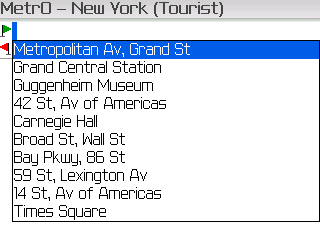
| The "Stops"
screen displays a complete list of stops available in the
current city database. Places of Interest (PoIs) are also
included, displayed in bold.
As with most lists, you can type the first letters from a name to scroll faster. When you have found your stop (and selected it in the list), access the menu to select it as the departure or arrival for your trip. When you are done with your selection, you can close the list or start the route calculation from the "Go!" option in the menu. |
 |
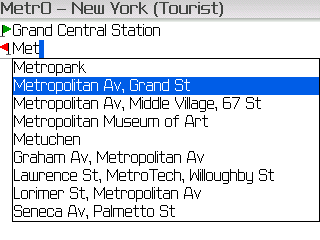
| If you want to enter the stop names with
the keyboard, an assistance screen will show
up after you enter a character. The screen contains a list of
matches for the text you typed: stop names starting with the
string entered, followed, if you entered 3 characters or more,
by the stop names containing the string (ignoring all
spaces, control and other special characters).
The list is updated when you type additional characters and disappears when no matches are found or the text field is empty. At any time you may scroll the list and select a stop. When you have the right one, push the trackwheel or press the "Enter" key to set the selection in the current text field and dismiss the assistance screen. When you are done with your selection, you can press the "Enter" key or use the "Go!" option in the menu to launch the route search. The assistance screen may be incompatible with the "SureType" technology available in some systems. In that case, you have the option to deactivate the assisted text entry feature (see below). |
 |
| You also have access to an
history of the last 10 stops used, by pressing
the "backspace" key on an empty field.
As for the assisted text entry feature, you may simply select a stop in the history list.. |
 |
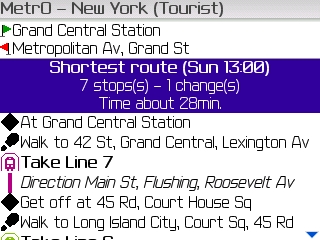
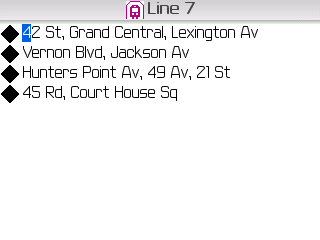
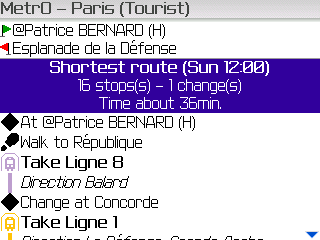
| As soon has you have launched a route
search, you are then taken back to the program main screen and,
after a short while, your route is displayed
with all the necessary details.
As with any version of Métro Then follows the description of the route, with its main stops and the line(s) to take. |
 |
| Top | |
| More... | |
If you scroll down the
results, you may notice that the icon on each line of text is
selectable and a "Details" menu option is
available. It gives you access to more information about the
stops and line sections of the route:
|
 |
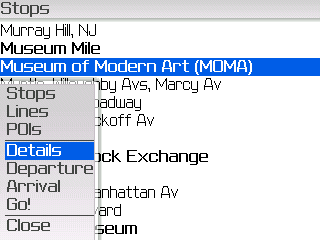
| Details are also available
in many other parts of the program. For example, if the focus
is on a the departure or arrival field in the main screen, the
"Details" menu option gives you information
on the stop name you have entered (if it is valid).
Another example (see screenshot) appears on the stop list we have described above: here, the "Details" menu option gives access to details about the selected stop or PoI. |
 |
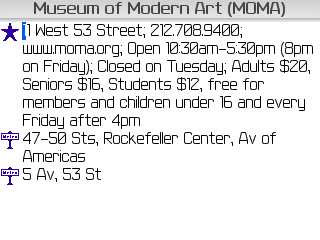
| Here is an example of the
kind of additional information you may expect
on a Place of Interest (PoI).
No action is possible in the details screen. |
 |
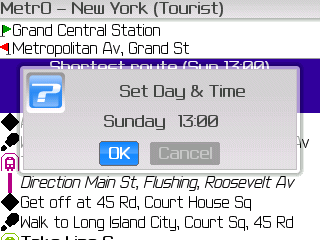
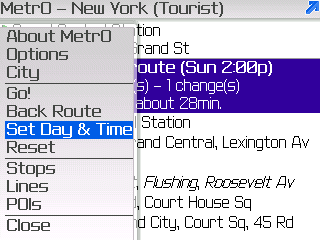
| By default, the program is
searching route for the current day and time. However, in many
cities, the public transportation network changes with time.
If you want to compute a route at another time, just select the
"Day & Time" option in the main screen
menu.
In the pop-up screen, select the desired day and time from the selection list and hit "OK". The selected day and time affect all parts of the program: trip calculations, line list (and their status), line routes (see below)... |
 |
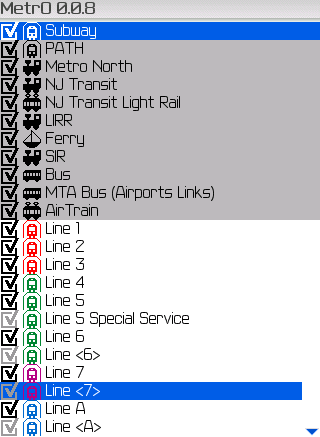
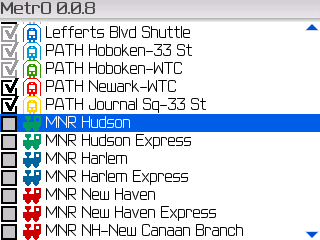
| Another option in the main
screen's menu - "Lines" - shows a list of the
available transportation systems & routes in the current
database.
Whenever available (almost for every city we cover), the system & line names are complemented with an icon representing the type of transportation system (subway, railway, bus, tram, trolleybus, funicular, boat/ferry...), painted with the color of the line. Lines which are not running at the currently selected day & time have their checkbox grayed out (e.g. Line 5 Special Service in the screenshot). You may still change their status, however. |
 |
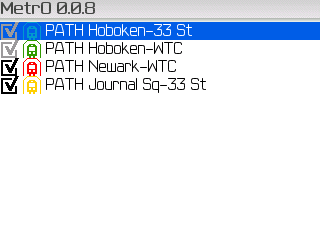
| When you select the
"Details" menu option while a system is
selected in the list, the list is reduced to the routes in that
system (in the screenshot, the PATH system was
selected).
The same options as in the complete list are available. |
 |
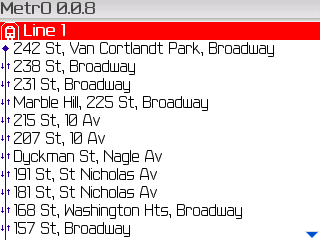
| When you select the
"Details" menu option while a line is selected
in the list, you will get a detailed view of the corresponding
route (with all stops), at the currently selected day &
time.
The icon next to each stop name shows whether the stop is served in both directions or in only one direction. The same options as on any stop list is available here (details and selection as the departure or arrival). |
 |
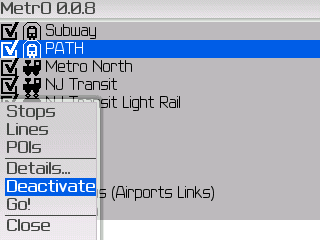
| The checkbox on the left of
each line shows whether the system or route is currently
"activated". Use the "Activate" or
"Deactivate" menu option to switch the status
of the selected system or route.
When a route is deactivated, it is not used when computing a route. When a system is deactivated, all lines in that system are deactivated (and are not used in a calculation). |
 |
| If a system is deactivated,
the checkbox for each line in that system is shown in an
"undetermined" state and its status cannot be changed.
On the screenshot, the "MNR" system has been deactivated and all the MNR lines are now unavailable. The program stores your choices whenever you activate or deactivate a system (not an individual line), keeping them unchanged on your next use of the program. |
 |
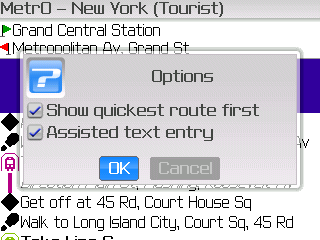
The "Options" entry in
the main screen menu lets you configure a few general
parameters for the program:
|
 |
The menu on the main screen
provides more options:
|
 |
| Top | |
| Contacts | |
Métro Beware! If you have many contacts recorded (a few hundreds), avoid using this feature, which could be extremely slow. |
|
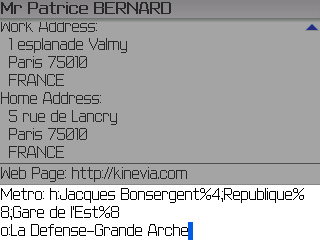
To use this capacity, you must first enter
the necessary information on your contacts:
|
 |
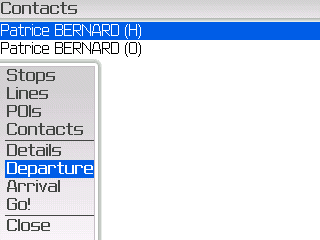
| When the contacts are properly configured, a new "Contacts" option appears in the program main screen menu. |  |
| You then have access to the list
of contacts, for which the stations and stops have
been provided.
You'll notice that two versions of a single contact may be displayed if you have provided informations for the home (marked '(H)') and office (marked '(O)') addresses. This list works like the other stop lists and lets you select a contact as start or destination point. |
 |
| You can also directly
enter a contact in the departure or arrival
field: prefix the contact name with an "@" sign. Of course, the
assisted entry feature is also available, if you did not
deactivate it, to select a contact.
When you search a route from or to a contact address, the program explores all the associated stops and suggests the otpimal solution for your trip. The detailed information for a contact shows its address and the closest stops, for the selected version (home or office). Only one adress is accessible, whatever the selection, on systems with version below 4.2.0. |
 |
| Top | |
| Known issues | |
A few (hopefully
minor) problems have been reported with the current version of
Métro
Anyone who may have a clue about these issues is welcome to contact us! |
|
| Top | |
| Todo | |
Compared to other
platforms, some features are missing from this
version of Métro
Be assured we will do everything to add these features as soon as possible but, in the meantime, please don't harass us about them! |
|
| Top |
| i-Métro | |
| Wenn si vollen nicht die Software
installieren, ermuntern wir Benutzer der BlackBerry-Geräte,
unsere "lo-fi"-Version von i-Métro Um i-Métro Denken Sie daran, dass Sie sobald Sie eine Stadt ausgewählt haben, ein Bookmark setzen können um den Zugriff in Zukunft schneller zu gestalten. |
 |
| Top | |
![]()
| Copyright © 2008-2010 Kinevia SARL. All rights reserved. Last update by Patrice BERNARD on 11/07/2010 |
Métro... |